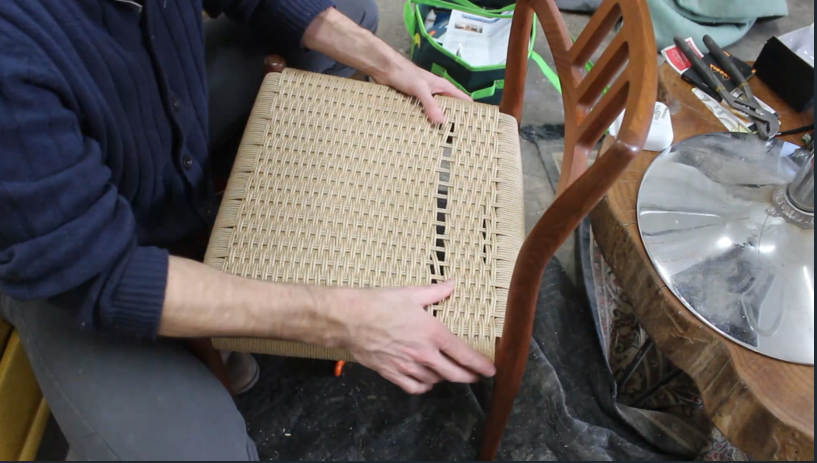
If you have a chair that has a paper cord seat there are several reasons that you might need to have it re-woven, broken paper cord being the biggest culprit, others could be stains that wont come out or even cats, they love to dig their claws into these seats sometimes. Lucky for you, I’m going to show you how to re-seat one of these chairs yourself. After watching the video, you still don’t think you are up to the task, there are people out there like me that will do this for you. One of these chairs, depending on your location, would cost around $300 to get a new Danish paper cord seat.
Please keep in mind that this is how I learned to do it and that it is not the only way to weave Danish cord.
Materials:
Chair
Danish nails
Squeeze clamp
Tack hammer
Tacks (optional)
Unlaced Danish cord (if you want it to be authentic for Moller chairs) -can use laced Danish cord or even fiber rush
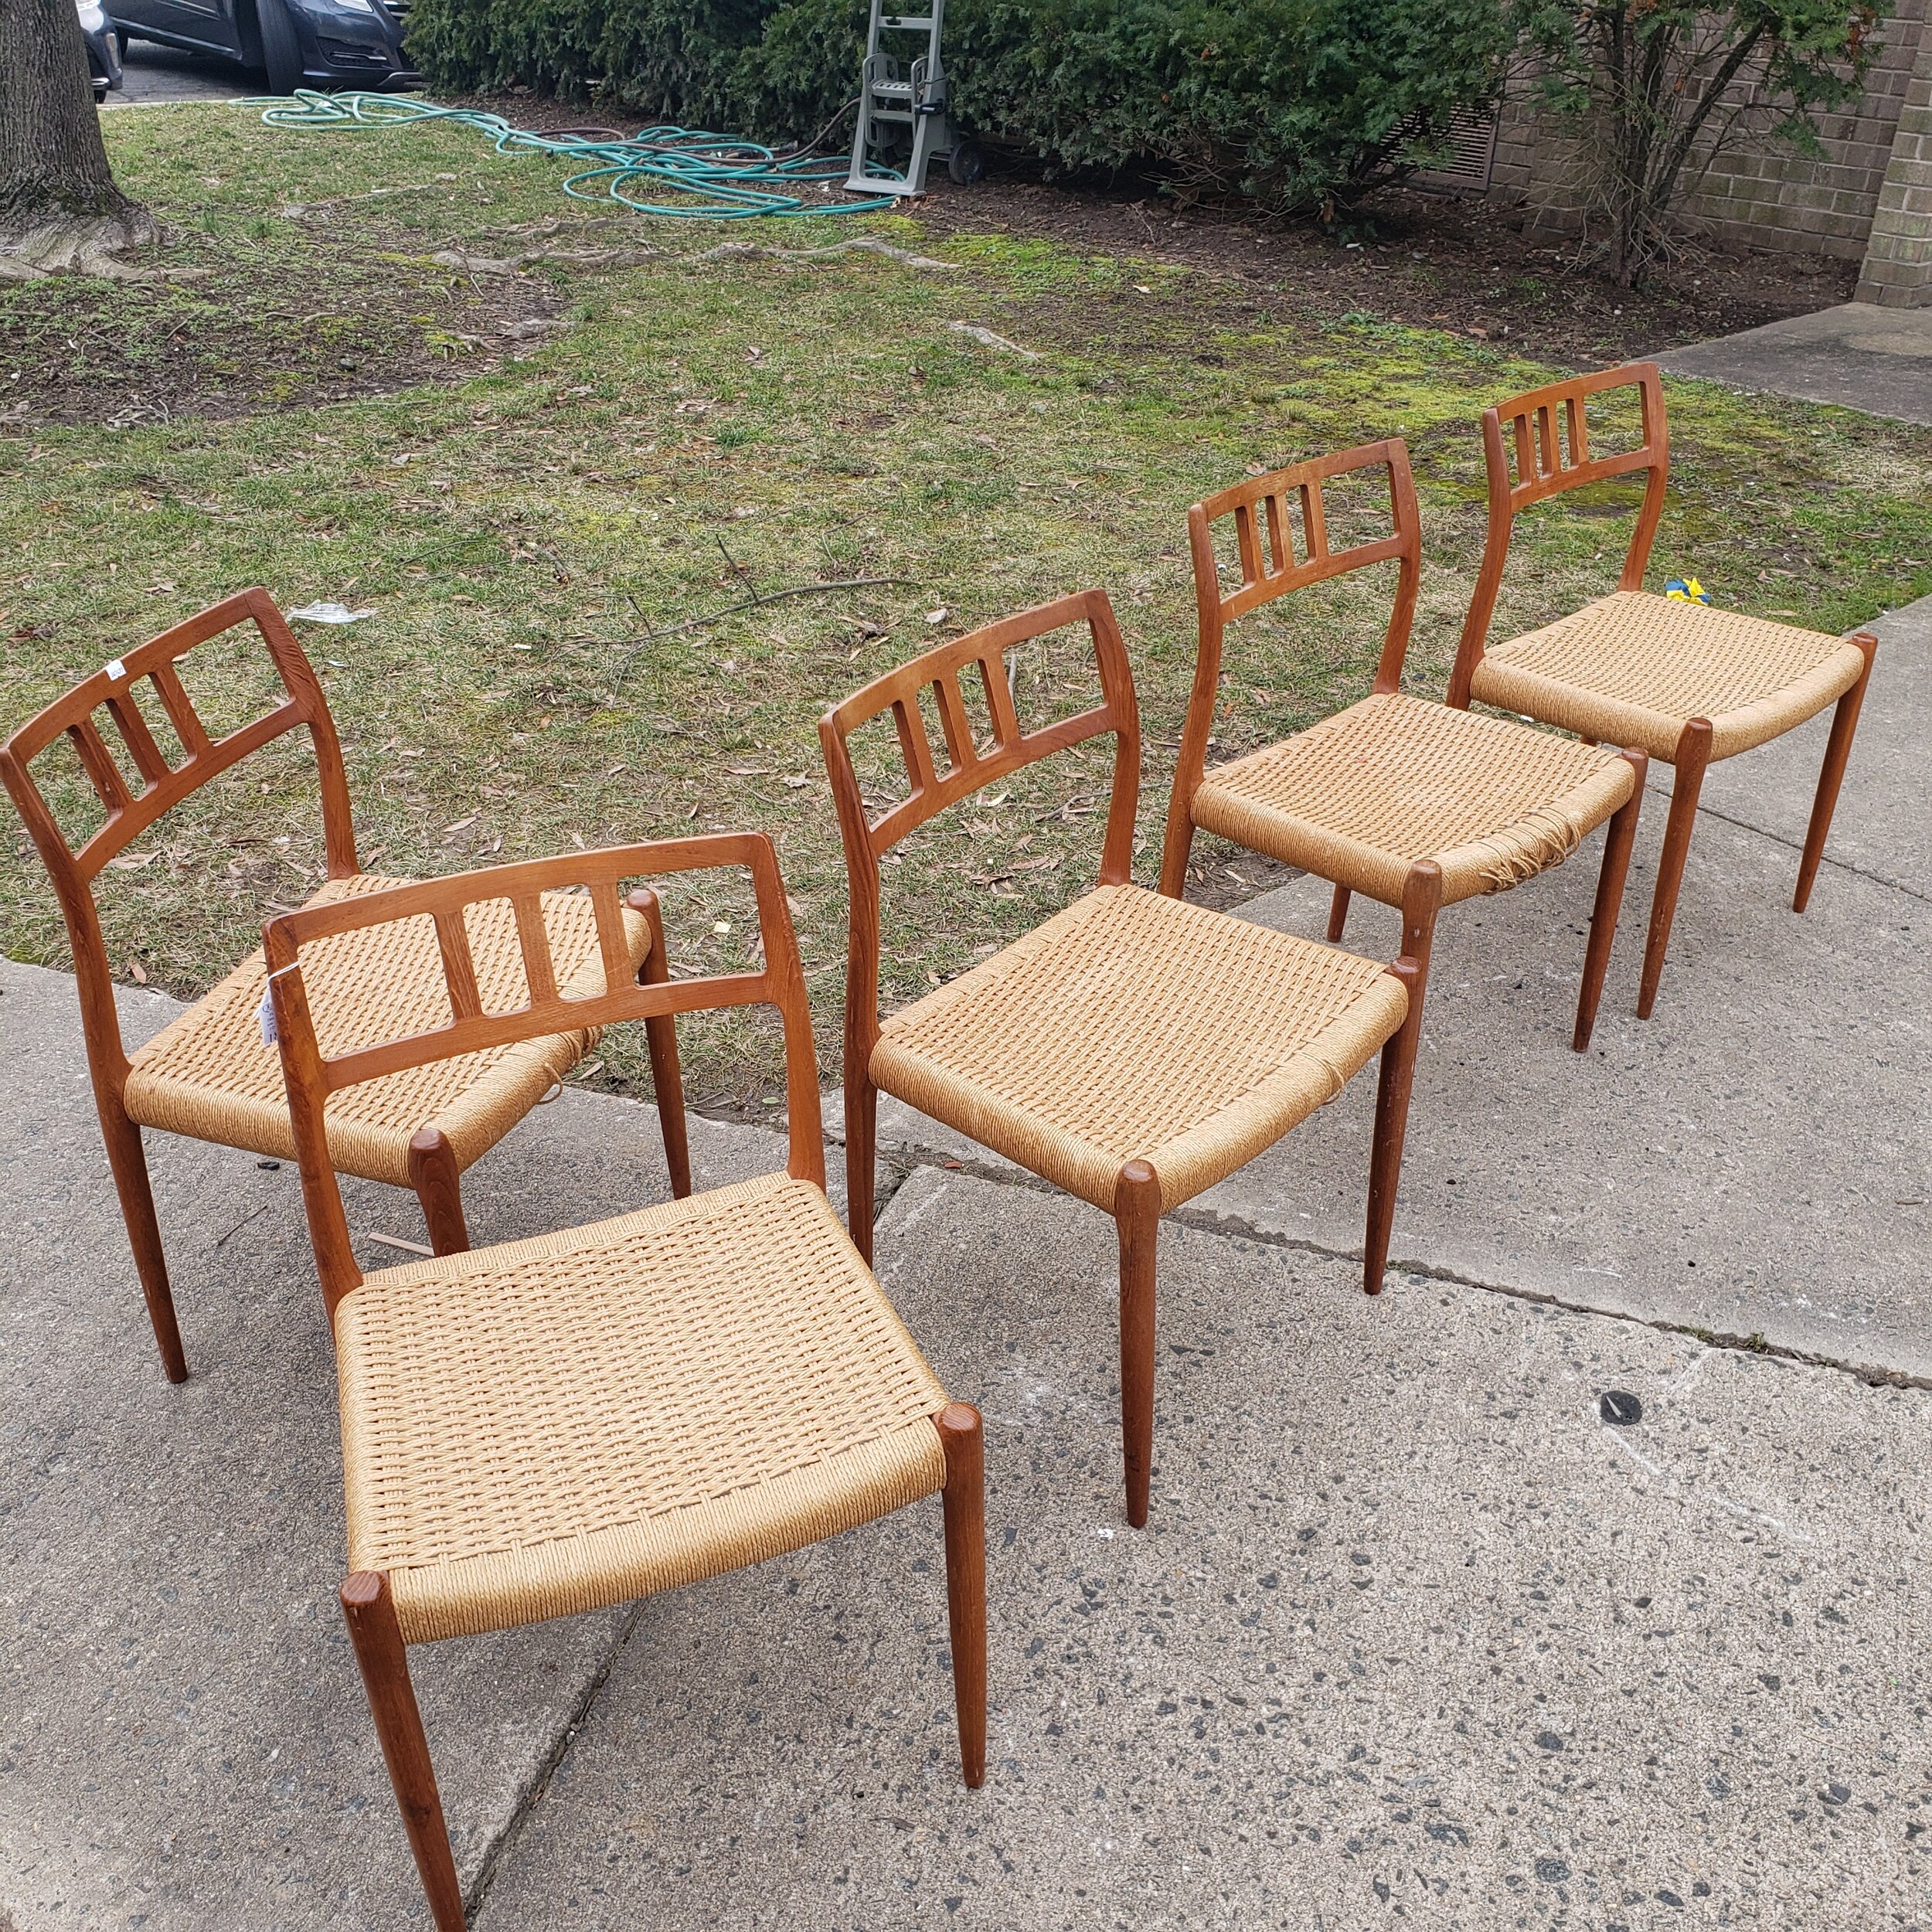
I have a set of teak J.L. Moller chairs that I acquired at an auction. They were in pretty good condition except for the woven seats had a few strands that were broken. While it is possible to repair a few strands, its difficult to match the patina of aged Danish cord.
i know there are 5, one has a damaged back rest that is currently beyond repair
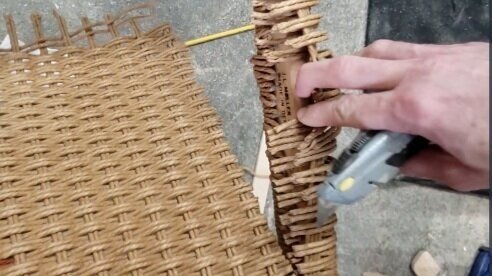
With that said, I removed all the Danish cord from these chairs, first by cutting the old cord Once the cords were all cut, underneath, you need to loosen the nails by slightly bending the nails back to get the cord lose. Then you remove the old cord. What you are left with is the chair with all the nails left in place. If a nail breaks or falls out, you can replace them.
For one chair, it takes about a 2-pound spool of unlaced Danish cord. You can get a 2-pound spool for about $30 from an online weaving supply store. Because I had several chairs to do, I used a 10-pound spool I got for $100 and made a spool holder with a lazy Susan to make the un-spooling easier.
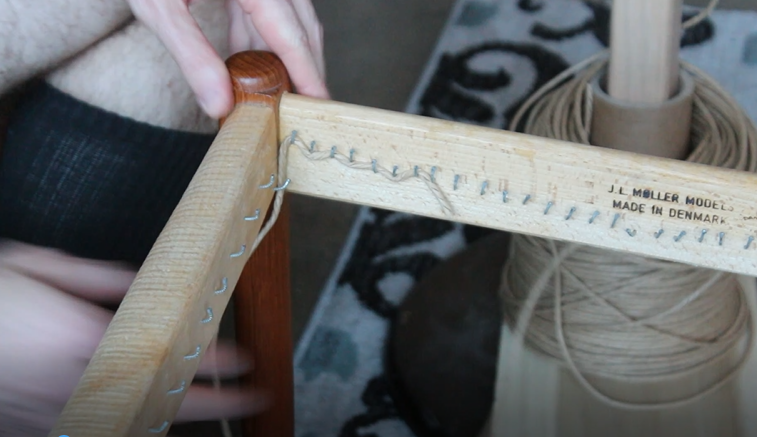
With the chair facing me and the spool on my left, I start on the front left of the chair, you have to secure the end of the cord to the chair, you can do this one of two ways. 1, you can use upholstery tacks to secure the cord to the front chair rail or 2, which I did, you can weave the cord over and under the nails on the left side rail with the tail going to the rear of the chair, you only need to weave it about 4 or 5 nails back. This will secure the cord.
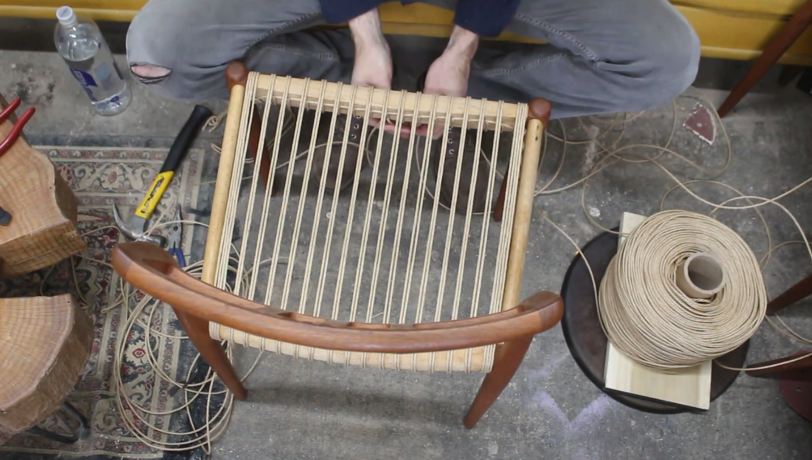
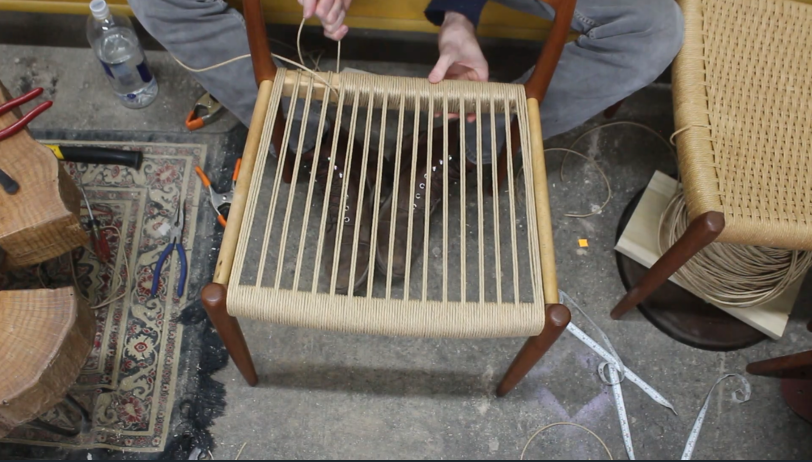
From here you start taking the cord on the inside of the first (left most) front nail and then by going under the front rail and back to the rear rail. This first set of strands will be a set of 4 (2 sets of 2)
In the rear of the chair, you will go over the rear rail from the front and up under to the left most nail from right to left then back over the rear rail (the way you came) to the front, hook on the nail from left to right and then back over the top to the back. Using the same nail in the back, right to left, hook the nail and go back to the front. When you get back to the front, hook on the nail and the next nail from left to right You will want to make sure the 4 strands are pushed all the way to the left You will be spanning two nails, your front to back strands will always be positioned over the nail.
You will continue to do this the entire way across the chair, each nail will get 1 set of strands except for the first and last sets, once you get to the last nail on the right of the chair, you will do 2 sets of strands totaling 4 strands. It will be the same as the start. Once you bring the last strand back to the front and hook the nail from left to right, you can either tack the strand in place or weave over under on the side rail nails to secure it in place and cut the cord. You can turn the chair over and hammer down the nails with a tack hammer on the front and back rails(all except the middle nail)
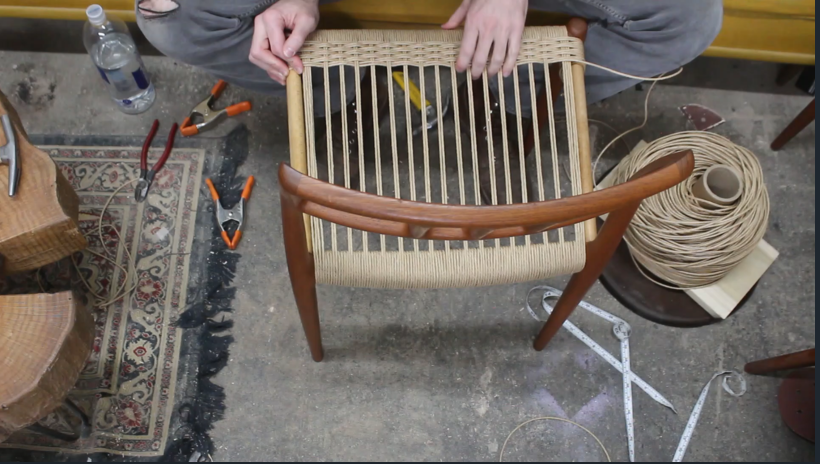
Now that you have all the front back strands completed, you will wrap the front and back stretchers. Starting on the front stretcher, you want to measure out 50 ft of cord and cut it from the spool. Find the center and hook it on the center nail. For the back rail it will be 40 ft. Separate the 2 halves so they do not get tangled.
If you took notice to the chair before you disassembled it, you will have noticed that the front rail normally has 5 wraps between the long strands. sometimes there are 6 or sometimes 4 but on the moller chairs its normally 5.
I wrap to the left first. On the 5th wrap, on the back of the chair rail, you have to cross over the strands that are already nailed. Continue wrapping the front rail until you get to the end, you want to get as many wraps as possible, making sure the front to back strands remain over the nails. When you get to the end you need to tack the cord in place(or you can over under weave it on the nails on the side rails.
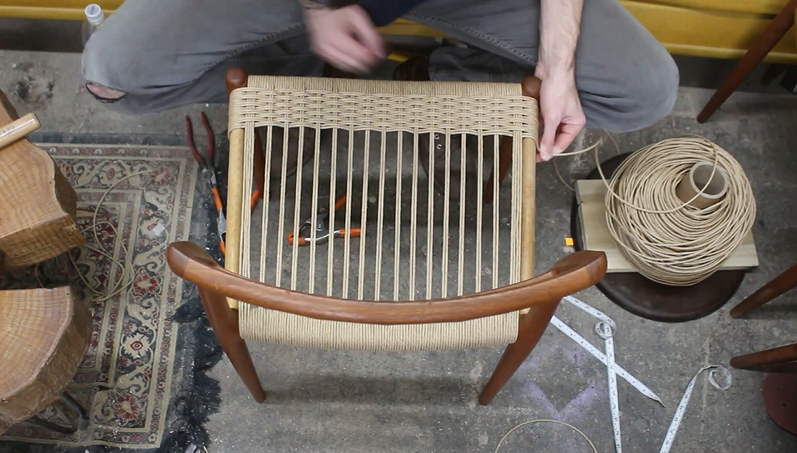
Once you have the front and back wrapped you will start weaving left to right . tack or over under weave the cord to the side rail and pull enough cord to reach the other side and start weaving, pull it taught, but not tight, hook the nail underneath and then pull the cord back on the other side, that is the first weave.
Use your fingers to pull the strands towards the front rail to keep things tight. Wrap the cord on the next hook on the left side, and start weaving to the other side.
Note, you will start opposite where you stated the time before. Continue to do this until you have done the hole chair. Depending how many nails there are, you will often have to double up on the nails so that you don’t run out by the time you get to the end. You will want to make sure everything is taught but not to tight.
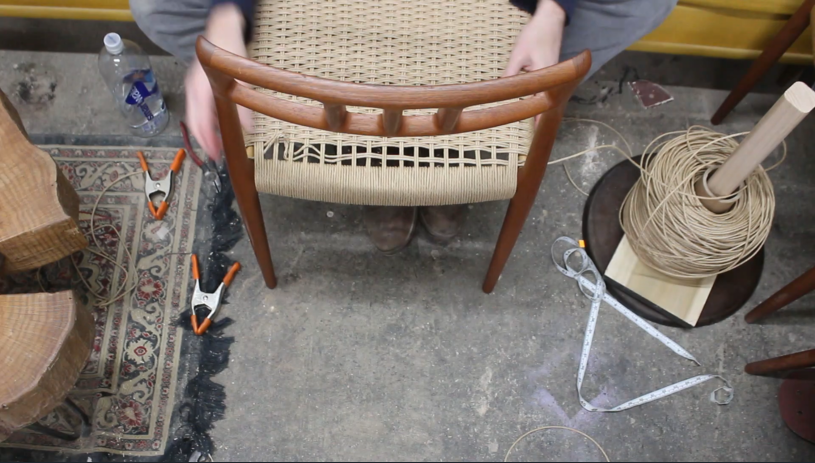
When you get to the end, it will get more difficult. Make sure you do not get the strands tangled or twisted. you need keep pulling the weave pattern to the from to keep it tight, the last strand or two will be tight and you may need to use a wood wedge to make some more space.
When you get your last pair in place, hook the tail of the paper cord on the last nail and either do the over under weave on a few nails or use a tack hammer and upholstery tacks to tack the cord in place. If you do this, you should use 2 or 3 tacks. Once you have it secured in place, you will need to cut off the cord. now that you are finished weaving, you will need to adjust the pattern of the seat. While you were weaving, you were pulling everything towards your body to make room, now we have to space out the patter to fill up the extra space we made.
Now you are done! you will want to inspect the chair to see if there are any mistakes that you can fix.
here is what the final chair looks like. let me know what you think. you can follow me on Instagram and feel free to subscribe on my YouTube channel for more videos
Subscribe►► https://www.youtube.com/channel/UCmMc...
https://www.instagram.com/minerva_enterprises/


