
Wood moves, there are charts and formulas out there to figure out how much it will move, but I don’t have time for that. This oak cookie slab has been drying for 5 years and developed a huge crack, it keeps getting bigger. You can see here I previously inlayed a walnut bowtie joint (sometimes called a butterfly or dutchman joint).
It seems that the bowtie was not big enough, both its height and the angles of the wings. So I fixed it. I started with a piece of walnut (8/4 planed to 1 and ¾ inch) because that’s what I have laying around (and I like it).

Step 1: I cut the piece to 5 inches and determined the angle I wanted.
Step 2: Set up the table saw for that angle. I used a 13 degree angle.
Step 3: Cut the bowtie out on the table saw, leaving a little so that the piece doesn’t fall out and I have a flat edge to do both sides to keep it square on the fence.

Step 4: Finish the cut on the band saw.
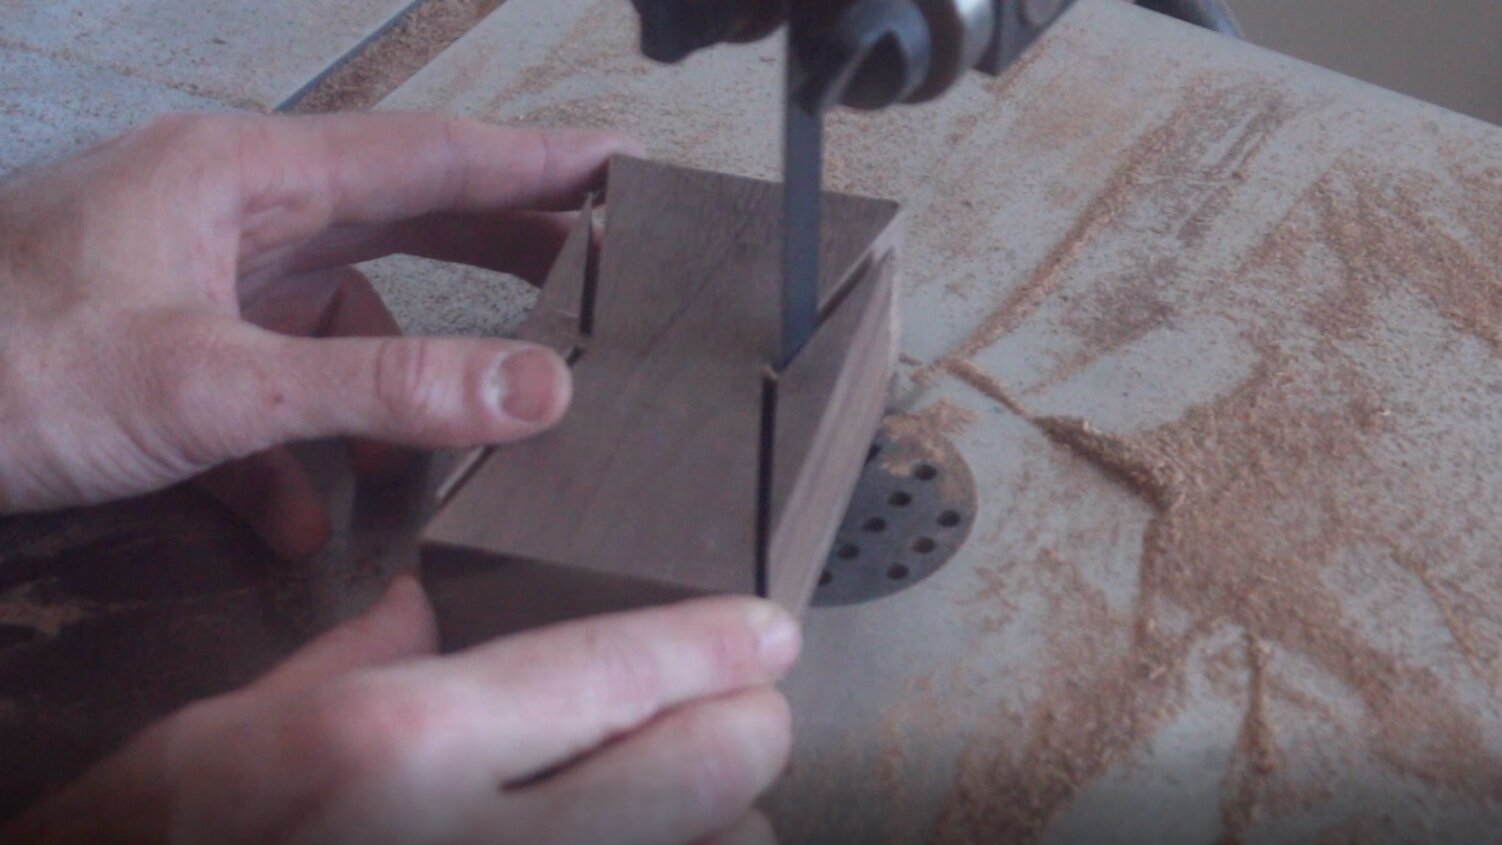
Step 5: Clean up the cut with a chisel.

Step 6: Next I put the bowtie where I want it and trace it out, I used a marking knife I got from amazon: heres the link: https://amzn.to/2oGnIXZ
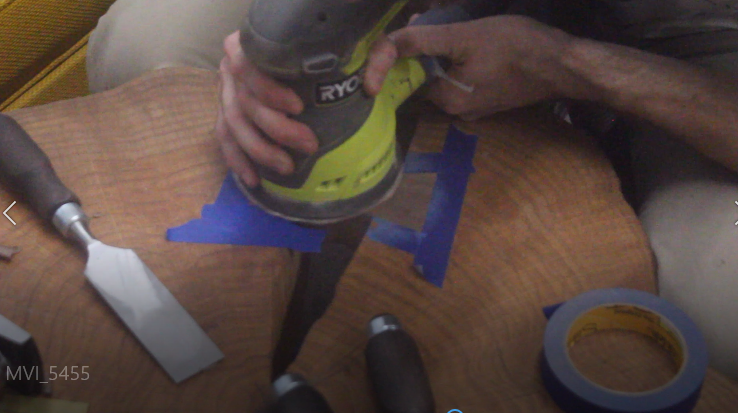
Step 7: Once I marked it, I used painters tape to outline the marks so that I can see it better and not cut past the tapes edge

Step 8: Next I set up my trim router with a ¼ spiral bit and started routing out the bulk of the wood inside the painters tape. I used an older Ryobi Trim router: here is the newest version on amazon: https://amzn.to/2oCxbzy

I had to make several passes to get down 1/ ¾ of an inch.
Step 9: After I removed the bulk of the wood, I used a chisel and wood mallet to remove the rest of the wood up to the line.

***Its important to have sharp chisels, be sure to check out my upcoming video to see a real simple and cheap way to sharpen you chisels using the “scary sharp” sharpening method which uses wet/dry sand paper!!***
Be sure to take small bites of the wood and sneak up on the line so that you don’t get carried a way and mess up the lines and remove to much wood.
Step 10: Check the fit of the bowtie often so that you know how close you are getting.
Once you remove the material up to the line and make any final trimmings, do a test fit. If it fits, great, if not, figure out where your getting stuck and remove that material.
Step 11: Next is the glue? Put it in the joint and on the bowtie(only the parts that will be in the wood)

Step 12: Use a wood mallet and a piece of scrap wood to tap the bowtie in place.

Step 13:If you have a little sticking up like I did, you can use a small planer or a large chisel to remove that material so that it is flush. Then sand it smooth, I went form 120, 180, 220 grit sand paper.

Step 14: Then apply you finish, I did multiple coats of Danish oil, using 0000 steel wool to smooth out between coats, you can also use a different finish If you have a preference.

Et Voila (I took French in high school)
Here is the new and improved Live Edge Oak Cookie Ccoffee Table with a Walnut Bowtie (talk about trying to hit all the SEO keywords haha)